![13 Awesome Weber Kettle Grill Cart Ideas [DIY Builds]](https://roomeena.com/wp-content/uploads/2026/04/13-Awesome-Weber-Kettle-Grill-Cart-Ideas-DIY-Builds.webp)
Summer is here, and that means the BBQ season is in full swing! If you’re anything like me, the sight of a sizzling Weber kettle grill brings back memories of backyard barbecues filled with laughter, delicious food, and the smoky aroma of grilled meats. But as I set up for my next cookout, I’ve been craving a better way to keep my grill organized and accessible. That’s where this post comes in. I wanted to compile some of the most creative and practical DIY grill cart ideas that will elevate your outdoor cooking experience.
If you love outdoor cooking and entertaining, this guide is perfect for you. Whether you’re a seasoned grill master or just diving into backyard barbecues, these DIY grill cart ideas will keep your grilling essentials organized while adding style to your outdoor space. From rustic wooden carts to portable setups, each idea brings its own charm and functionality, allowing you to enjoy your grilling adventures without the hassle of clutter.
In this post, you’ll discover 13 awesome Weber kettle grill cart ideas that are not only practical but also fun to build. You’ll find inspiration for every style and space, so you can create the perfect setup for your backyard gatherings. Get ready to impress your friends and family with a stylish and functional grill cart that will make your outdoor cooking sessions even more enjoyable!
Key Takeaways
– Explore 13 unique DIY builds for Weber kettle grill carts that enhance your outdoor cooking area.
– Discover options like rustic wooden carts and eco-friendly designs to match your style.
– Learn about portable grill setups that make grilling on the go a breeze.
– Find solutions for efficient grill storage to keep your tools organized and accessible.
– Gain inspiration for multi-functional carts that can serve as beverage stations or food prep areas.
1. Rustic Wooden Cart

Imagine the charm of a rustic wooden grill cart that transforms your backyard into a cozy retreat. Using reclaimed wood, this cart not only looks stunning but is also built to withstand the elements. Adding wheels makes it effortlessly mobile, allowing you to rearrange your space for gatherings with ease. With shelves for your grilling tools and spices, everything you need is always within reach!
Tips:
– Choose a food-safe wood stain to enhance the wood’s natural beauty.
– Consider planting a small herb garden on the cart for fresh flavor right at your fingertips.
This cart is perfect for those who love a natural aesthetic while enjoying outdoor cooking and entertaining.
Difficulty Rating & Requirements
Overall Difficulty Rating: Medium
Building a DIY Weber kettle grill cart can be a fun yet challenging project. It requires some basic woodworking skills and a bit of creativity. This project is suitable for intermediate DIY enthusiasts who have a passion for outdoor cooking and are comfortable using tools. If you’re a beginner, you might want to start with simpler projects before tackling this one.
Time Estimate:
⏱ Estimated time: 8-12 hours
The time needed can vary based on the design you choose. Here’s a breakdown of major phases:
– Planning and Designing: 1-2 hours
– Gathering Materials: 1-2 hours
– Construction: 5-8 hours
– Finishing Touches: 1-2 hours
Skill Requirements:
– Required skills: Basic woodworking, measuring, cutting, and assembly
– Beginner-friendly: No
If you have some experience with tools and building, you should be fine. Skills like measuring accurately and using a saw are essential. While some skills can be learned during the project, others, such as woodworking precision, take practice.
Tools & Materials Needed:
🧰 Essential items checklist:
– Wood (Pine, Cedar, or Plywood) – Required
– Saw (Circular or Hand Saw) – Required
– Drill and Drill Bits – Required
– Screws and Wood Glue – Required
– Sandpaper – Required
– Paint or Wood Stain (Optional) – Optional
– Wheels (Optional for portability) – Optional
– Measuring Tape – Required
Step-by-Step Overview:
1. Planning and Designing (1-2 hours): Decide on what kind of cart you want and sketch out your design. Consider dimensions that fit your Weber kettle. Think about storage needs too.
2. Gathering Materials (1-2 hours): Purchase the necessary wood, screws, and tools. Make sure to double-check your measurements before buying.
3. Construction (5-8 hours): Start building your cart according to your design. Cut your wood to size, assemble the frame, and add shelves or hooks for utensils. This is the most time-consuming but rewarding phase.
4. Finishing Touches (1-2 hours): Sand down rough edges for safety and aesthetic. If desired, apply paint or wood stain to protect and personalize your cart.
5. Final Assembly (If applicable): Attach wheels if you want portability and ensure everything is securely fastened.
Cost Comparison:
Professional vs DIY: Hiring a professional to build a custom grill cart can cost anywhere from $300 to $800, depending on materials and complexity. On the other hand, a DIY approach can keep costs around $100 to $250. If you’re handy and enjoy DIY projects, building your own cart can be a fulfilling and budget-friendly option. If you’re unsure about your skills, consider hiring help for more complex designs.
2. Metal and Wood Hybrid

Looking for a stylish upgrade? A metal and wood hybrid grill cart blends modern industrial vibes with warm natural elements. A sturdy metal frame paired with wooden shelves creates an elegant contrast that’s also durable. This design is not only visually appealing but also built to last through any weather.
Benefits:
– Metal frames withstand the elements effortlessly.
– Wooden shelves bring a cozy touch to the overall look.
Bright colors on the metal can turn this cart into a stunning statement piece for your backyard barbecues!
3. Collapsible and Portable

Short on space? A collapsible grill cart is your ultimate solution! This DIY build allows for easy stowing when not in use, making it perfect for small patios or balconies. With simple hinges and a folding design, you can have a functional grill station that transforms into a compact unit in seconds.
Features to include:
– Use lightweight materials to ensure easy handling.
– Add storage compartments that fold out for your grilling essentials.
Ideal for spontaneous outdoor cooking, this portable setup changes the game for small spaces!
4. Vintage Cart Revival

Why not breathe new life into an old cart? A vintage cart revival is a creative way to repurpose items like bar carts or wagons into unique grill carts that spark joy and conversation. This DIY project not only recycles materials but also adds a touch of character to your outdoor space.
Steps to consider:
– Start by cleaning and restoring the vintage piece for functionality.
– Add hooks and shelves as needed for tools and accessories.
This nostalgic approach combines practicality with charm, making your outdoor area reflect your personality and passion for cooking.
5. Built-In Grill Cart Design

Elevate your outdoor kitchen with a built-in grill cart design! If you have adequate space, incorporating a stationary grill cart into your outdoor countertop creates a seamless cooking experience. This design can enhance your aesthetic while providing ample storage for all your grilling essentials.
Consider these aspects:
– Use durable materials like stone or ceramic tiles for the countertop.
– Design storage compartments underneath to hold tools, charcoal, and utensils.
This setup allows for an organized cooking area, perfect for those who love to entertain larger gatherings.
6. Eco-Friendly Cart

If you’re environmentally conscious, consider building an eco-friendly grill cart from sustainable materials. Bamboo or reclaimed wood can be used, ensuring that all finishes are non-toxic and environmentally friendly. This cart not only meets your grilling needs but also reflects your commitment to the planet.
Tips:
– Look for FSC-certified wood options to ensure sustainability.
– Incorporate recycled metal for the cart frame.
This green approach can inspire others to join in enjoying outdoor barbecues with a conscience.
7. Multi-Function Cart

Why limit yourself to just a grill cart when you can have a multi-function masterpiece? This versatile cart can double as a prep station, storage for coolers, and even a portable serving area. Its versatility makes it the ideal companion for outdoor entertaining.
Must-have features:
– A fold-out table for food preparation.
– Adjustable shelving for flexible storage options.
This cart can be the centerpiece of your outdoor gatherings, ensuring an efficient cooking and serving experience!
Did you know that a fold-out prep table can cut meal setup time by 40%? A multi-function cart doubles as a serving area and storage, turning outdoor gatherings into seamless, chef-grade events.
8. Minimalist Design

Less is definitely more with a minimalist grill cart design that emphasizes clean lines and functionality. A straightforward cart made from metal or wood with only the essentials gives your outdoor area a modern and uncluttered appeal.
Focus on:
– Smooth surfaces complemented by a neutral color palette.
– A few carefully selected accessories that enhance the grilling experience.
This design prioritizes ease and style, making it a fabulous fit for contemporary outdoor spaces.
Minimalist grill carts cut clutter by up to 40% on compact patios. Stick to clean lines, neutral tones, and a few essential accessories—the result is faster prep, easier cleaning, and a calmer outdoor space. Pro tip: pair with spa cover ideas for a sleek, protected look.
9. Customizable Cart

Why not craft a grill cart that’s fully customizable to suit your unique needs? Start with a basic frame and add your creative touch—think modular shelving, painted panels, or interchangeable tool holders. This approach ensures your cart is not only functional but also a true reflection of your personal style.
Consider:
– Use magnetic strips for easy access to tools.
– Choose colorful paint or stain that complements your outdoor decor.
The design possibilities are endless, allowing you to create a cart that works best for your grilling habits and taste.
10. Compact Vertical Storage

If space is limited, a vertical storage grill cart is a stylish and practical choice. This design utilizes vertical shelving to maximize your storage while maintaining a small footprint. It’s ideal for urban gardens or smaller backyards where every inch counts.
Ideas to include:
– Use wall-mounted hooks for tools.
– Incorporate vertical racks for condiments and spices.
This setup keeps everything organized and easily accessible during your outdoor cookouts, making it both functional and attractive.
11. Stylish Tile Top Cart

Why not add a splash of color and flair to your grill cart with a stylish tile top? This DIY cart features a beautifully tiled surface that’s not only visually appealing but also easy to clean. Choose colorful or patterned tiles to make a statement, while a sturdy wooden or metal frame ensures durability.
Benefits:
– Tiles are heat resistant and easy to maintain.
– A unique surface can tie in beautifully with your patio decor.
This cart can become the focal point of your outdoor area, enhancing the overall aesthetic of your cooking space.
12. Outdoor Beverage Cart

Combine the joy of grilling with refreshing drinks by creating an outdoor beverage cart that complements your grill setup! This dedicated cart can hold everything from drinks to snacks, ensuring your guests are happy while you focus on cooking. Adding ice bins or coolers makes chilled beverages easily accessible.
Ideas to enhance:
– Use weather-resistant materials for durability.
– Incorporate a small bar area for cocktails and refreshments.
Your guests will appreciate having drinks right by the grill, making your outdoor entertaining both effortless and enjoyable!
13. Artistic Display Cart

Why not turn your grill cart into a unique artistic display? An artistic cart can showcase unique designs, vibrant colors, and finishes that capture attention. Use murals, decals, or themed decorations to reflect your personality while keeping the cart functional.
How to personalize:
– Choose a theme that resonates with your style.
– Incorporate artistic elements like hand-painted designs or crafted shelving.
This creative approach will not only showcase your individuality but also enhance your grilling experience, making it all the more enjoyable.
Your artistic display cart can be an art piece without sacrificing function. Pick a theme, add hand-painted designs or decals, and swap in seasonal decor to keep it lively. Practical tip: build small, sturdy shelves for display and easy cleaning while you cook.
Conclusion

Creating a DIY Weber kettle grill cart can unlock a world of possibilities for your outdoor cooking experience. Each of these ideas reflects a unique style and purpose, ensuring that there’s an option for everyone, whether you have a sprawling backyard or a cozy patio. Take inspiration from these designs, customize them to fit your needs, and let your creativity flow!
Your grill cart can not only serve a functional role but also enhance your outdoor entertaining space. So pick your favorite idea and start building!
Note: We aim to provide accurate product links, but some may occasionally expire or become unavailable. If this happens, please search directly on Amazon for the product or a suitable alternative.
This post contains Amazon affiliate links, meaning we may earn a small commission if you purchase through our links, at no extra cost to you.
Frequently Asked Questions
What are some awesome Weber kettle grill cart ideas for DIY builds?
Here are practical directions to get you cooking in style. Start with a sturdy base—a weatherproof cabinet or a simple platform on treated lumber or a stainless frame. Add a lower shelf for charcoal, a vertical rack for tools, and a front drawer for tongs and thermometers. Plan for mobility with lockable wheels so you can move your Weber kettle around as the sun shifts or you need to sweep the patio. Use weather-resistant finishes like marine-grade paint or exterior-grade sealant on plywood. Include a slim prep surface on the side, plus a trash bin and a lighter starter storage. For grill storage solutions, add a dedicated pull-out tray for charcoal, a pegboard for utensils, and a heat-proof shelf near the handle. For portable grill setup, design fold-down sides or removable panels to cut weight when relocating. In short, blend practical storage, mobility, and weatherproof materials to get the most out of your DIY grill cart for outdoor cooking and backyard barbecue ideas.
How can I design a compact grill cart that fits a Weber kettle while keeping outdoor cooking organized?
Start with exact dimensions: measure the kettle with lid closed, then add a little clearance for airflow and lids. Build a cart that’s 2–3 inches wider on each side for stability. Use vertical storage like hooks on a pegboard, a spice rack, and magnetic strips for thermometers. Include two shelves: a lower shelf for charcoal bins and a mid shelf for plates and tools. Choose durable materials such as stainless steel, powder-coated aluminum, or marine plywood with a weatherproof finish. Budget-friendly tips include repurposing pallets or reclaimed wood, using a thin stainless steel top, and sealing all edges. Add mobility with locking casters and a stable wheelbase. This approach keeps the setup compact, neat, and ready for outdoor cooking and backyard barbecue ideas while preserving a true portable grill setup.
What materials hold up best for a Weber kettle grill cart in a backyard environment?
For longevity, prioritize materials that resist moisture, heat, and rust. Go with 304 or 316 stainless steel for rails, doors, and frames, or use powder-coated steel for a budget-friendly yet durable option. Wood accents can be real teak or cedar with a marine seal to withstand weather, while treated plywood or exterior-grade plywood works well for shelves if you seal them well. Add a heat-resistant top or backsplash where the kettle sits, and avoid interior wood that can swell. Finish hardware with stainless or coated alternatives to prevent rust. Regular maintenance—wiping grease, re-sealing annually, and cleaning wheels—keeps your outdoor cooking space looking sharp and ready for big backyard barbecue ideas for years to come, while staying true to the grill storage solutions that make DIY grill carts practical.
What are some budget-friendly DIY grill cart ideas that still look great for backyard barbecue ideas?
You don’t need a big budget to get a stylish, functional cart. Try pallets or reclaimed wood for the frame, paired with a weatherproof plywood top. Use cinder blocks or a simple metal frame as a sturdy base, then top with a stainless sheet or cutoff steel plate for a clean surface. Add a couple of hooks and a pegboard for utensils, and mount a small sink or water jug if you want prep space. Seal everything with exterior stain or paint, and finish with a weatherproof sealer. For mobility, attach locking wheels and consider a fold-out side table for extra workspace during a cook. This approach hits outdoor cooking, grill storage solutions, and backyard barbecue ideas without breaking the bank, while still delivering a DIY grill cart that looks professionally finished.
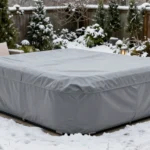
Are there spa cover ideas that can inspire protective covers for your Weber kettle grill cart during the off-season?
Absolutely. spa cover ideas often emphasize rugged, weatherproof, and snug-fitting designs—perfect inspiration for grill covers too. Look for heavy-duty, UV-resistant materials with breathable venting to prevent moisture buildup. Measure your cart with extra clearance for handles and wheels, then choose a cover with adjustable straps or elastic hems to keep wind from lifting it. If you want a neat aesthetic, pick a color that matches your outdoor decor and use a cover with a built-in stove area shield to protect hot surfaces. By adapting spa cover concepts, you can keep your Weber kettle cart pristine through off-seasons and rainstorms, ensuring your outdoor cooking setup is always ready for action.

![13 Custom DIY Outdoor Griddle Ideas [Built In Layouts]](https://roomeena.com/wp-content/uploads/2026/04/13-Custom-DIY-Outdoor-Griddle-Ideas-Built-In-Layouts-150x150.webp)